
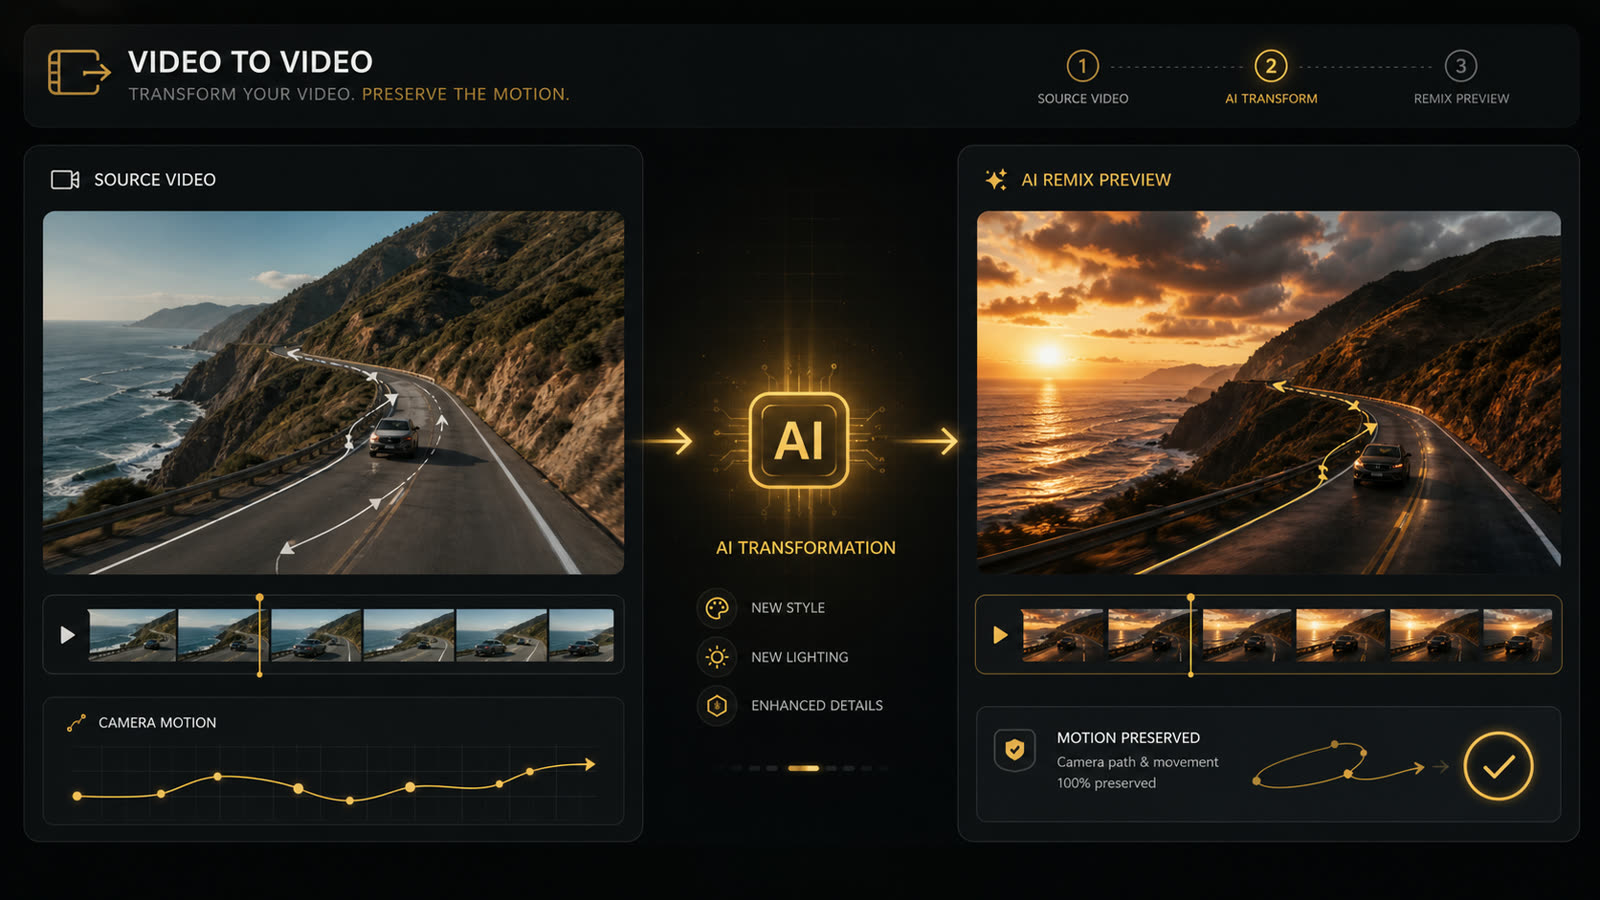
Source clip to AI remix
An existing clip provides timing, movement, and camera rhythm while the prompt changes the creative direction.
Existing Clip to AI Video
FluxMov Video to Video AI Generator transforms an existing clip or source video into a new guided AI video. Upload the clip that should guide timing, movement, or camera rhythm, add a prompt for what should change, choose output settings, and generate a remix that stays closer to the source video than prompt-only generation.
Video to Video is the direct route for reworking footage you already have. Use it when the source clip carries useful action, timing, camera rhythm, or composition, but the final output needs a new subject direction, style, scene mood, or social-ready variation.
Quick answer
What it does
Video to Video AI uses a source video or existing clip as the control layer for a new generated video. The clip guides timing, motion, camera rhythm, or scene structure.
Best input
Use a short, clear MP4 or MOV clip with one main action, readable subject movement, stable framing, and limited cuts. The cleaner the clip, the easier the remix is to review.
Prompt role
Use the prompt to describe what should change: style, subject direction, lighting, background, animation look, product mood, or social-video format.
Best first test
Start with a 3-10 second source clip and one clear change request. Add longer clips, faster cuts, or stronger style changes only after the first result looks stable.
Last updated:
Video to Video AI transforms an uploaded source video or existing clip into a new guided AI video. The source video provides timing, movement, camera rhythm, or scene structure, while your prompt explains the style, subject, and creative changes you want.
Start from footage you already have instead of asking a prompt to invent every movement, angle, and timing cue from scratch.
Use the prompt for style transfer, scene mood, subject direction, animation look, lighting, format, or details that should change.
Review orientation, quality, duration, model choice, and credit estimate before submitting a generation.
Switch to Reference to Video for image guidance, Image to Video for still animation, or Motion Transfer when exact character movement is the main goal.
Follow these steps to prepare a source clip, describe what should change, and generate a cleaner AI video remix.
Add the existing clip that should guide the new result. Short clips with one main action, readable movement, and stable framing work best for first tests.
If the output should follow a specific character, product, outfit, visual style, or brand look, add a clear image or describe it in the prompt.
Use the prompt for the remix direction: animation style, lighting, background, camera mood, product angle, social-video format, or scene cleanup.
Select orientation and quality based on where the result will be reviewed or published, then check the credit estimate before generation.
Review motion continuity, subject stability, camera rhythm, background changes, and style consistency before extending the workflow.
Choose the workflow by the media you already have and the control source that matters most.
| Workflow | Best for | Required inputs | Main limitation |
|---|---|---|---|
| Video to Video | Remixing, restyling, or reworking an existing clip while keeping useful timing, movement, camera rhythm, or scene structure. | Source video or existing clip plus prompt, with optional subject or style image. | Fast cuts, heavy blur, crowded scenes, and long multi-scene videos can reduce consistency. |
| Reference to Video | Guiding a generated clip with a still image when the subject, product look, character style, or visual direction should come from an image. | Reference image plus prompt. | It is image-guided, so it is weaker when a source video should control timing, camera rhythm, or action structure. |
| Image to Video | Animating one still image directly when the uploaded image should be the visible starting point. | Source image plus prompt. | The model must infer movement unless you provide a separate video-controlled workflow. |
| Text to Video | Creating a quick scene concept when you do not have a source image or source video yet. | Written prompt. | Prompt-only generation gives the least direct control over timing, camera rhythm, and exact motion. |
| Motion Transfer | Applying movement from a clip to a chosen character, avatar, mascot, or subject image. | Character image plus motion source video. | Best for movement transfer rather than broader video restyling or campaign remix variations. |
Use Video to Video when the control source is an existing clip. Use Reference to Video when the control source is a still image.
Use a clear source video, focused prompt, and optional subject or style image so the remix has a stable control source.
Use a clear MP4 or MOV clip with one main action, readable subject movement, stable framing, and limited cuts. Short 3-10 second clips are best for first tests; longer clips are easier after the direction works.
Add a JPG, PNG, WebP, or clear visual reference when the generated video should follow a product, character, outfit, art direction, or brand look.
Use 20-80 words to explain what should change in the source video. Describe style, mood, scene, subject direction, output format, and anything the clip does not already show.
Use source videos, likenesses, products, logos, music, and character designs you own or have permission to use, especially for commercial or client-facing outputs.
Use these settings to understand output quality, source-video interpretation, duration billing, and prompt control.
Treat the uploaded video as the structure layer. It can guide timing, movement, camera rhythm, pose flow, or composition depending on the clip quality and selected model.
Use a lower-cost setting for direction tests and higher quality when the source motion, prompt, and subject direction already look stable.
Match the output frame to the target platform before generation, such as vertical for Shorts/Reels/TikTok or widescreen for web and presentation clips.
Keep the prompt aligned with the source video. Strong style changes are easier than contradictory motion instructions that fight the uploaded clip.
Explore ways to turn existing clips into AI video remix variants, restyled footage, and short-form concepts.
Turn one source clip into multiple visual directions for campaign tests, creator hooks, or concept review.
Use a source video for timing and composition, then prompt a new look such as cinematic, animated, product-focused, or social-first.
Use an existing clip as the movement structure while guiding the output toward a character, avatar, mascot, or product figure.
Prepare a vertical or widescreen variation from a clip direction before committing to more expensive production passes.
Remix the uploaded source video into a cinematic AI video with dramatic side lighting, clean subject detail, stable camera rhythm, and a polished campaign look.
Transform the uploaded clip into an animated video style while preserving the source timing, main action, camera direction, and readable subject movement.
Use the uploaded source clip as timing and camera guidance, then create a clean product-focused video with premium lighting, simple background, and social-ready framing.
These visuals show how an existing clip becomes a guided AI video remix, where the source video controls timing and the prompt changes the creative direction.
An existing clip provides timing, movement, and camera rhythm while the prompt changes the creative direction.
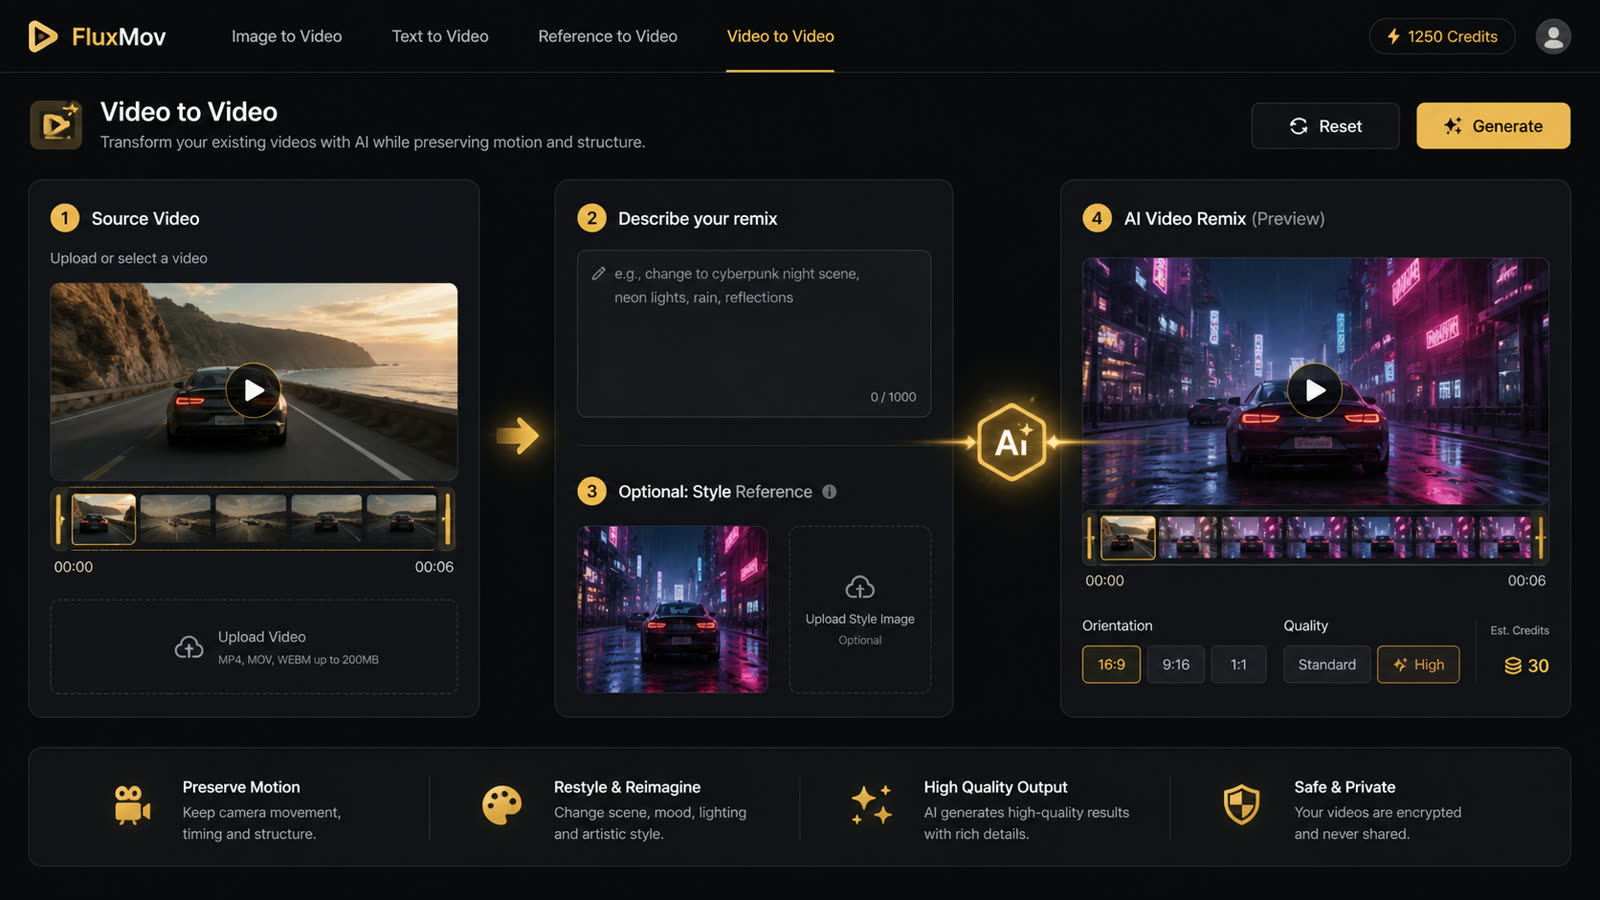
Upload a source video, add prompt and optional style guidance, then review output settings before generation.
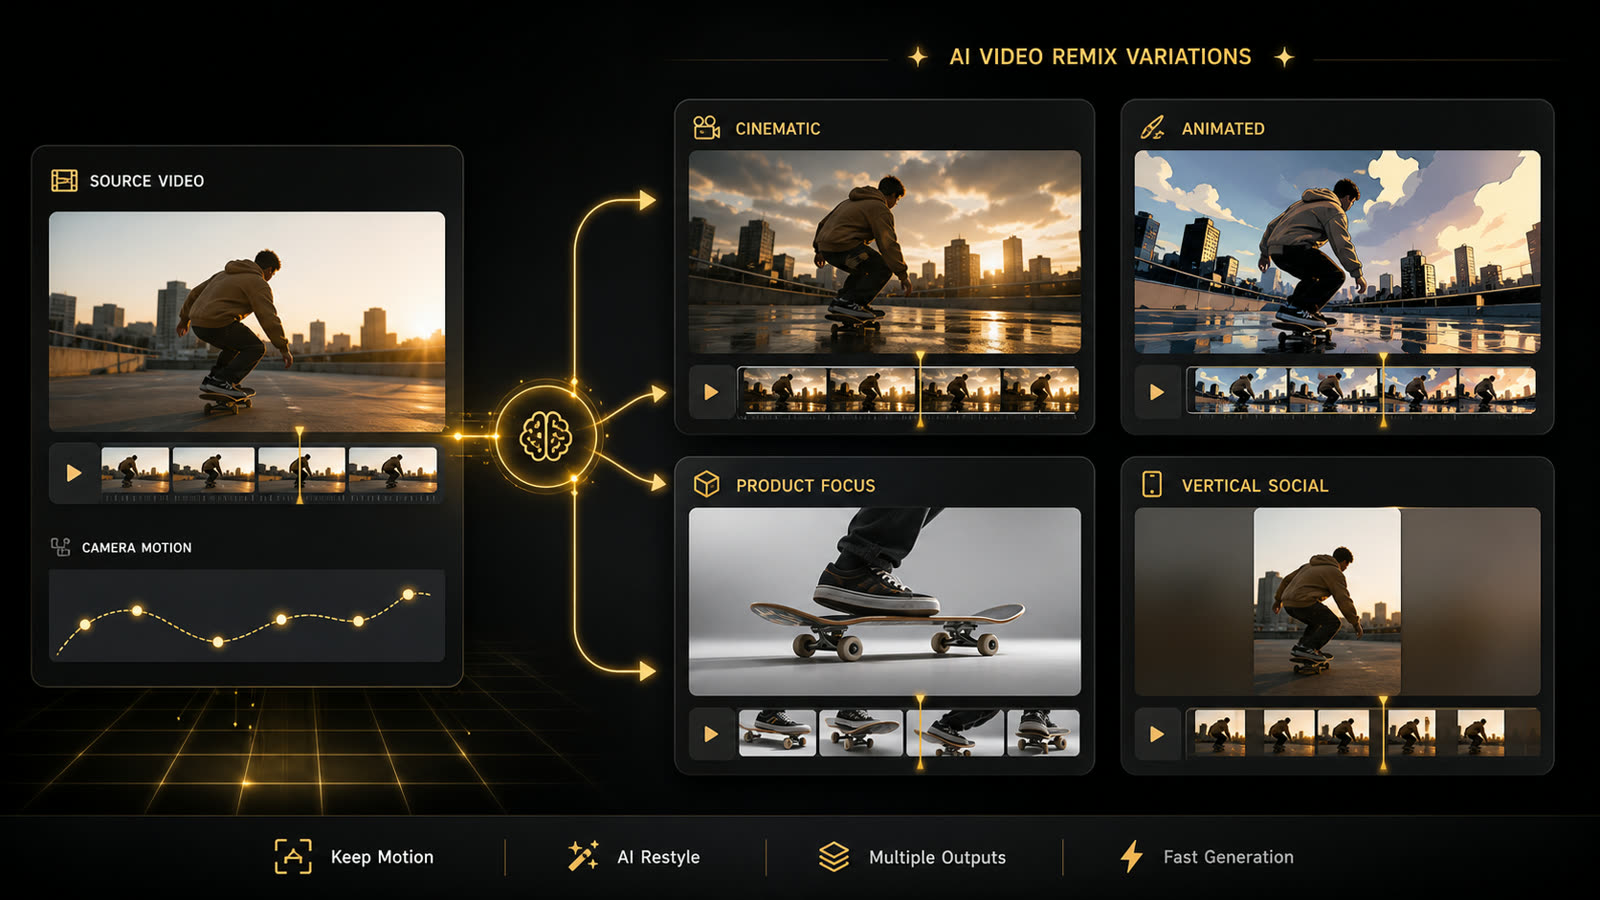
Use one source clip to test cinematic, animated, product-focused, and social-ready video directions.
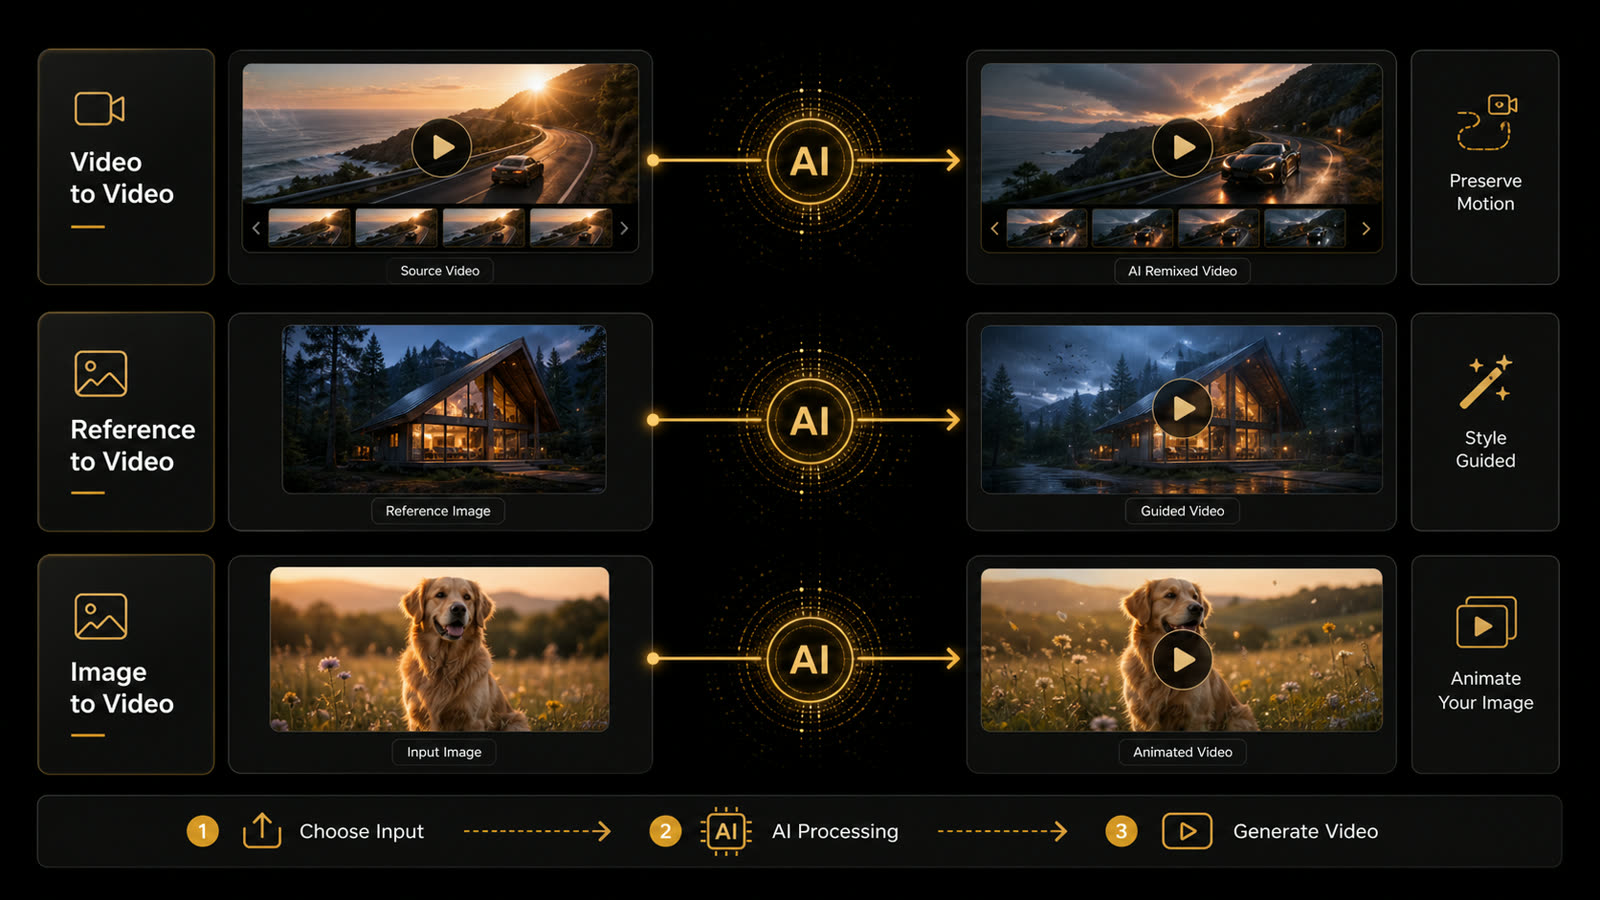
Use Video to Video for source clips, Reference to Video for still reference images, and Image to Video for still image animation.
Answers to the most important questions before you start creating.
A video to video AI generator transforms an existing clip into a new AI video. The source video can guide timing, action, camera rhythm, or scene structure, while the prompt describes what should change in the output.
Video to Video starts from a source video or existing clip. Reference to Video starts from a still image, so it is better when an image should guide subject, product look, character style, or visual direction.
Image to Video animates one still image. Video to Video uses a clip as the control source, so it is stronger when timing, movement, camera rhythm, or source-video structure should influence the result.
Use a short MP4 or MOV clip with one clear subject, readable movement, stable framing, and limited cuts. Avoid heavy motion blur, crowded scenes, strong occlusion, and long multi-scene videos for first tests.
Yes, Video to Video can be used for animation-style tests when the source clip provides useful timing or motion. Use the prompt to describe the animation style, scene mood, lighting, and level of realism you want.
It can help preserve source timing and movement cues, but exact motion is not guaranteed. Results depend on clip clarity, subject visibility, camera movement, model choice, and whether the prompt conflicts with the source video.
Use Motion Transfer when your main goal is to apply movement from a clip to a chosen character, avatar, mascot, or product figure. Use Video to Video when the broader source clip should guide a remix or restyle workflow.
Commercial use depends on your plan, provider terms, and the rights attached to the source video, people, products, logos, music, and character designs you upload. Only use media you own or have permission to remix.
Explore adjacent workflows without losing the same reference-led video creation path.
Use when a still image should guide the subject, style, product look, or visual direction.
ExploreAnimate one source image when the uploaded still should be the visible starting point.
ExploreStart from a written scene when you do not have a source image or source video yet.
ExploreUse when exact character movement, pose timing, or dance motion transfer is the main goal.
ExploreUse when a finished source video should keep its scene while the visible subject changes.
ExploreStart free
Upload an existing clip, describe the change you want, and generate a new AI video variation that keeps useful source-video structure while changing the creative direction. Log in to claim 120 free credits and generate for free.
Log in to Generate for Free